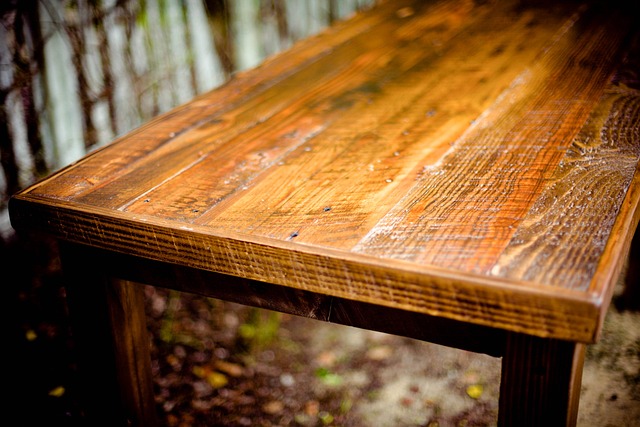
An old wooden table holds many fond memories and stories for generations to come, yet with time it may become worn-down and faded, losing its beauty and functionality. Don’t despair, though! In this comprehensive guide we’ll show you how to restore it back to its former glory with just some effort, basic tools, and love of craftsmanship – bringing joy back into its lifespan for future generations to enjoy!
Inspection and Preparation
Before undertaking the restoration process, carefully assess your wooden table for damage, loose joints or structural issues.
Make a list of the areas that require attention and gather the necessary tools and materials. Basic equipment will include sandpaper, wood glue, clamps, wood filler, wood stain, and a protective finish.
Cleaning and Stripping
Begin by cleaning the table’s surface with mild detergent and water. Be careful not to damage the wood with harsh chemicals. Next, remove any old paint, varnish, or stain using paint strippers or sandpaper. Sanding the surface smooth will allow new finishes to adhere better.
Repairing and Replacing
Address any structural issues or loose joints by applying wood glue and clamping the parts together until the glue dries. For missing or severely damaged parts, consider seeking professional advice or sourcing matching wood for replacements. Thoroughly sand down the repaired areas for a seamless finish.
Sanding and Smoothing
Sand the entire table to ensure a smooth surface for staining. Begin with a coarse grit sandpaper and gradually move to finer grits until the surface is silky to the touch. This step is crucial for achieving an even stain and a polished final appearance.
Staining and Finishing
Choose a stain that complements the table’s aesthetics and apply it in the direction of the wood grain. Allow the stain to penetrate the wood for the recommended time before wiping off any excess. Once the stain dries, apply a clear protective finish, such as polyurethane or lacquer, to safeguard the wood and enhance its natural beauty.
Polishing and Buffing
After the finish has dried, lightly buff the table with a soft cloth to achieve a gentle sheen. Be careful not to apply too much pressure, as this could affect the finish.
Maintenance and Care
Now that your old wooden table has been beautifully restored, it’s essential to implement a regular maintenance routine to keep it looking its best. Dust the table regularly with a soft, lint-free cloth to prevent the buildup of dirt and grime. Place hot and wet items away from the surface to prevent damage. Additionally, use coasters and placemats to protect the wood from scratches and spills. Every few months, apply a fresh coat of protective finish to maintain its luster and shield it from everyday wear and tear.
Embrace Imperfections
While restoring your old wooden table, you may encounter imperfections that cannot be fully repaired. Embrace these unique characteristics as they add to the table’s history and character. If the imperfections do not compromise the table’s stability or functionality, consider leaving them be, allowing the table to tell its story through the marks of time.
Safety Precautions
Throughout the restoration process, prioritize safety. Wear protective gear such as safety goggles, gloves, and a mask when working with chemicals, stains, and finishes. Always work in a well-ventilated area to avoid inhaling fumes, and ensure proper disposal of any hazardous materials.
Wrapping Up
Reviving an antique wooden table can be an exhilarating endeavor, combining creativity with craftsmanship. By following our step-by-step guide, you can restore its former beauty while prolonging its beauty for many more years to come. So, roll up your sleeves, grab those tools, and get ready to restore your treasured table! All right, that’s all for this article. You should look into this Foldable Gaming Chair with Bluetooth if you’re looking for one.


